Step 01: Login into cPanel.
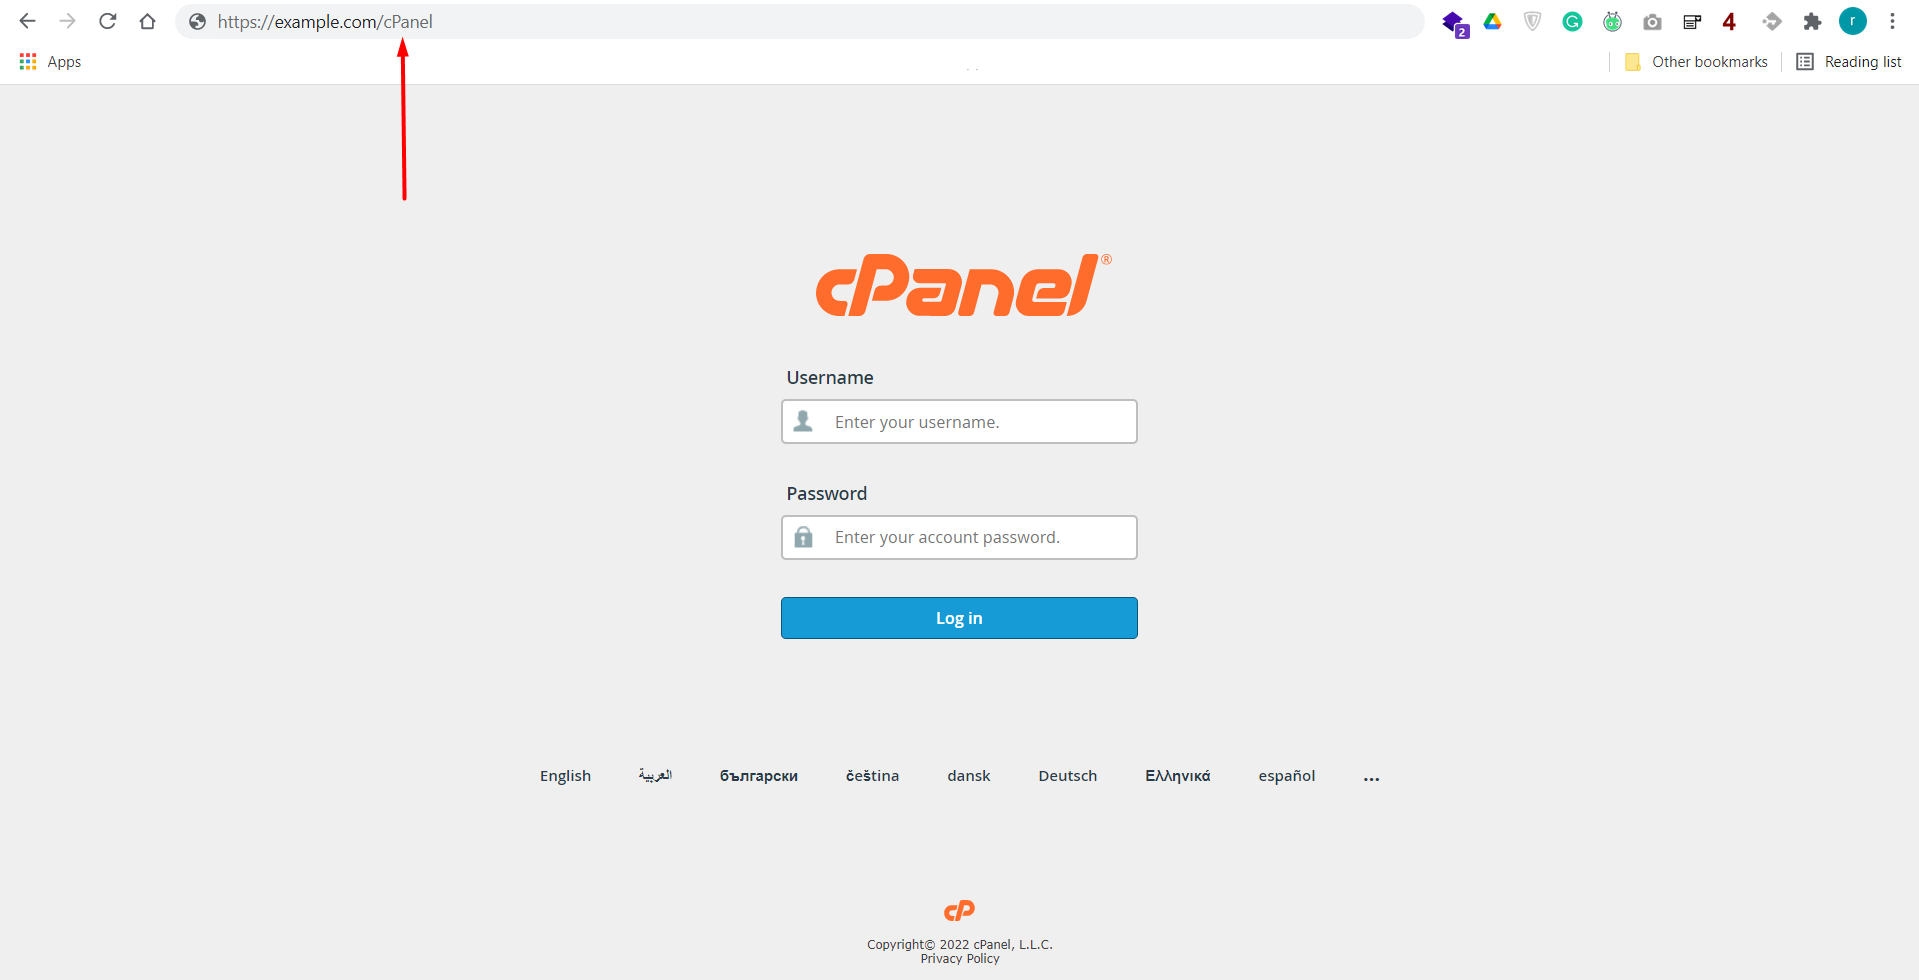
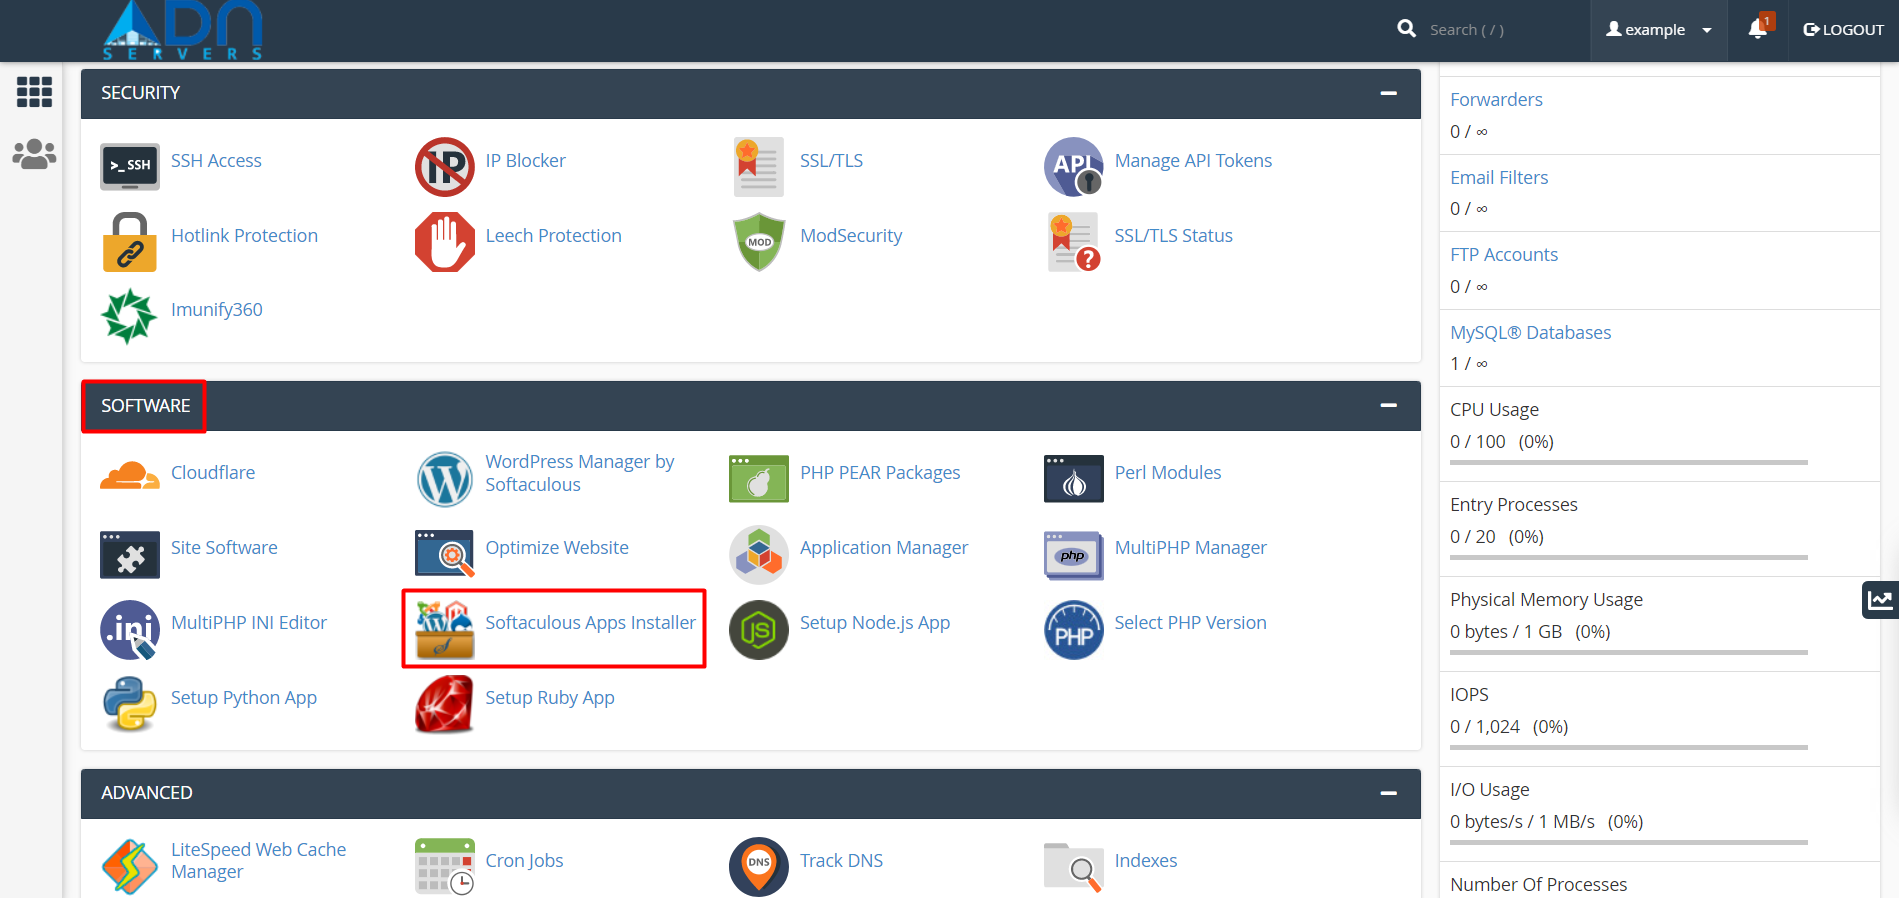
Step 02: Look for the Softaculous icon in the Software panel and click.
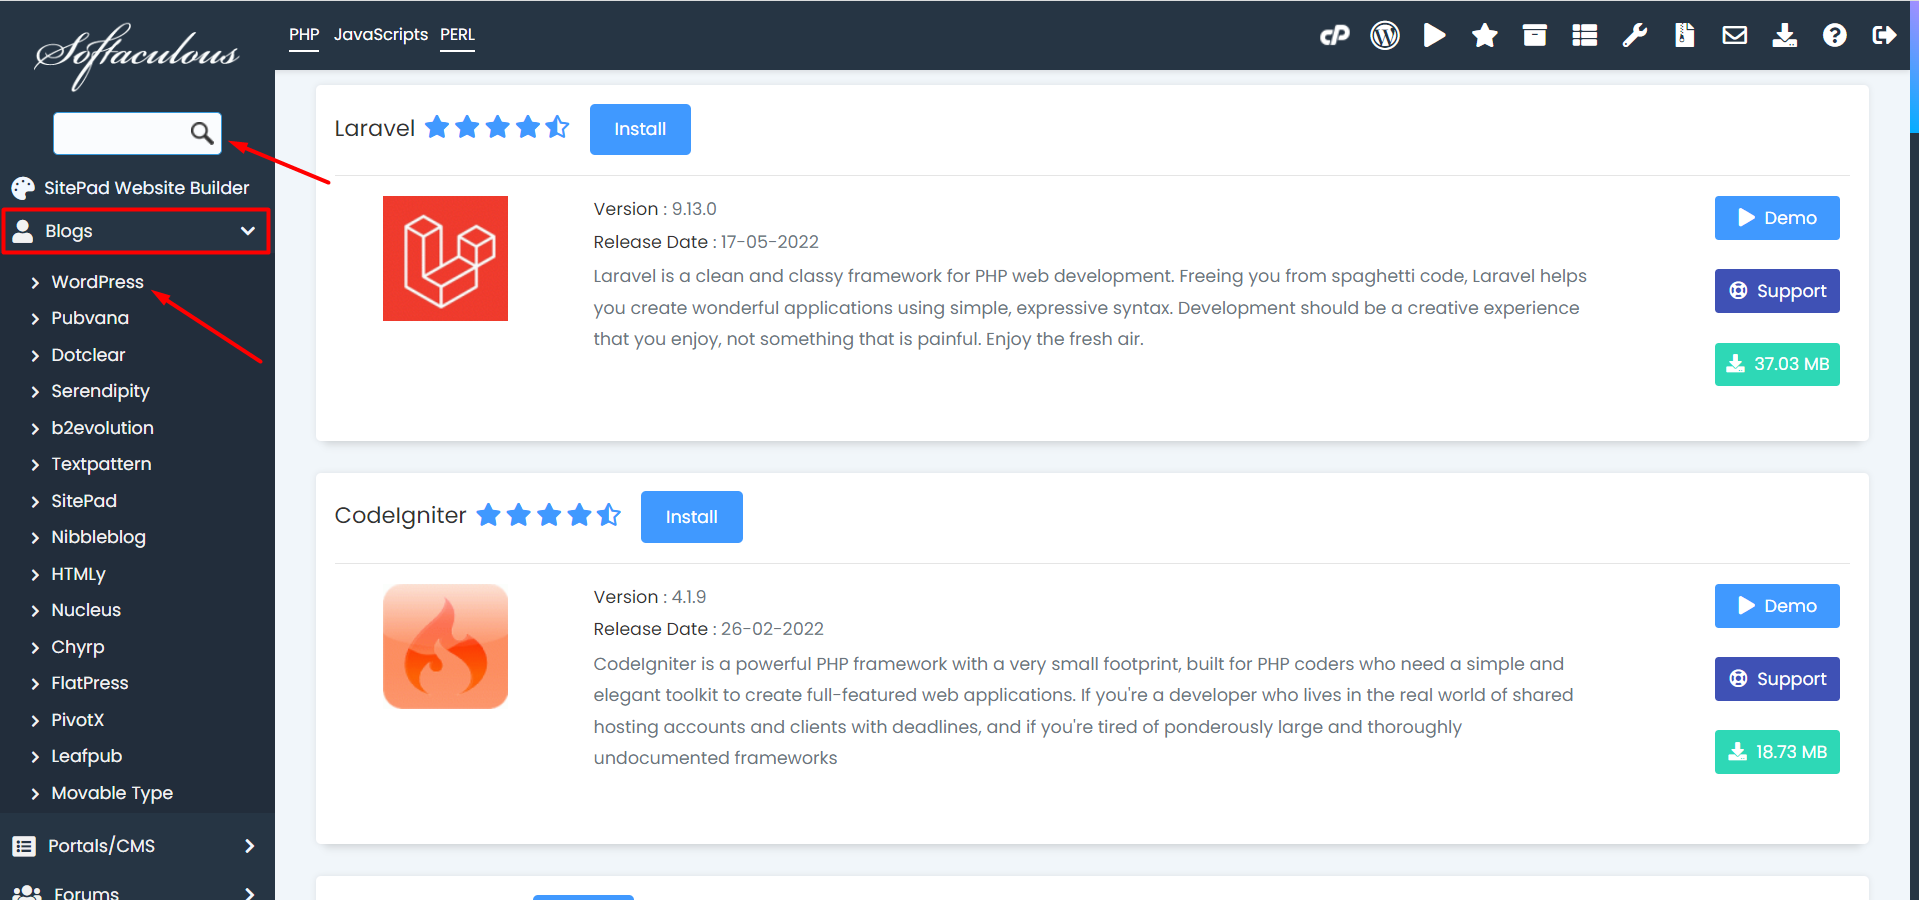
Step 03: You may search directly with the "WordPress" keyword neither from the blog sub-menu.
Step 04: Locate and click on the Install button to display the install form.

Step 05: Fill out the install form
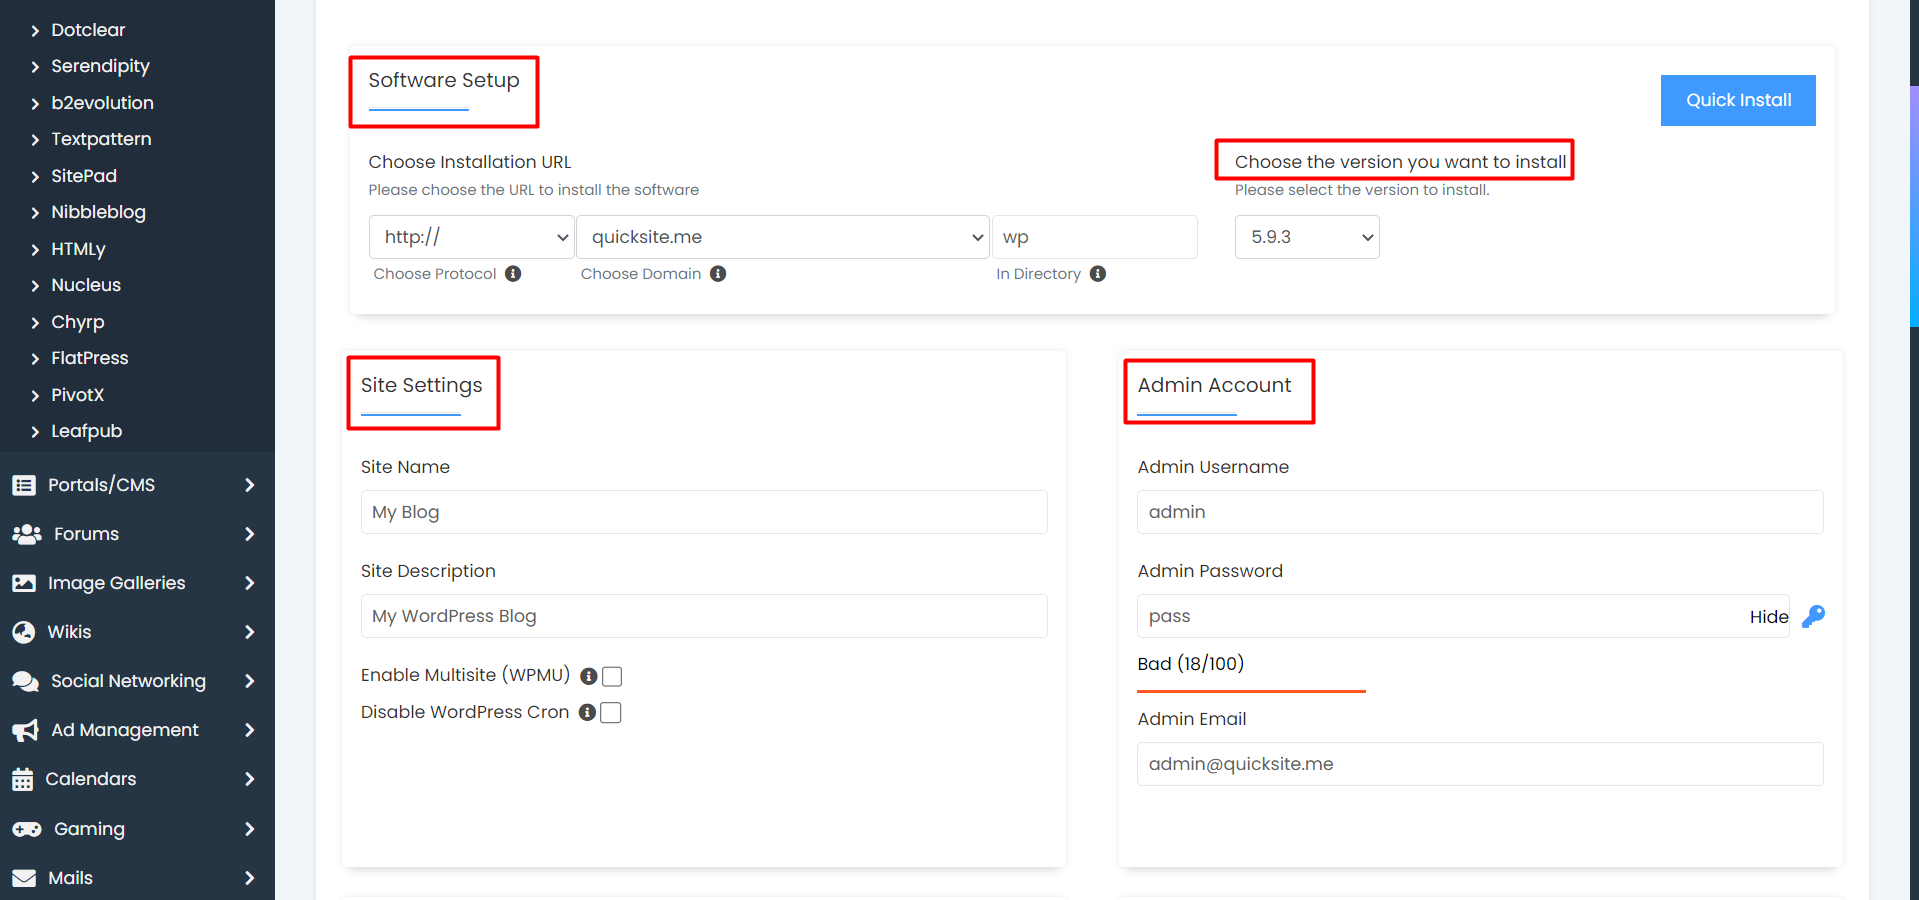
- Choose Installation URL: Choose the domain and the folder where you want to install WordPress.
- Version: Choose the version from the dropdown menu that you want to install.
- Site Settings: Change the "Site Name" and "Site Description".
- Admin Username: Choose the username for the WordPress admin account.
- Admin Password: Choose the password for the WordPress admin account.
- Admin Email: Choose the email for the WordPress admin account.
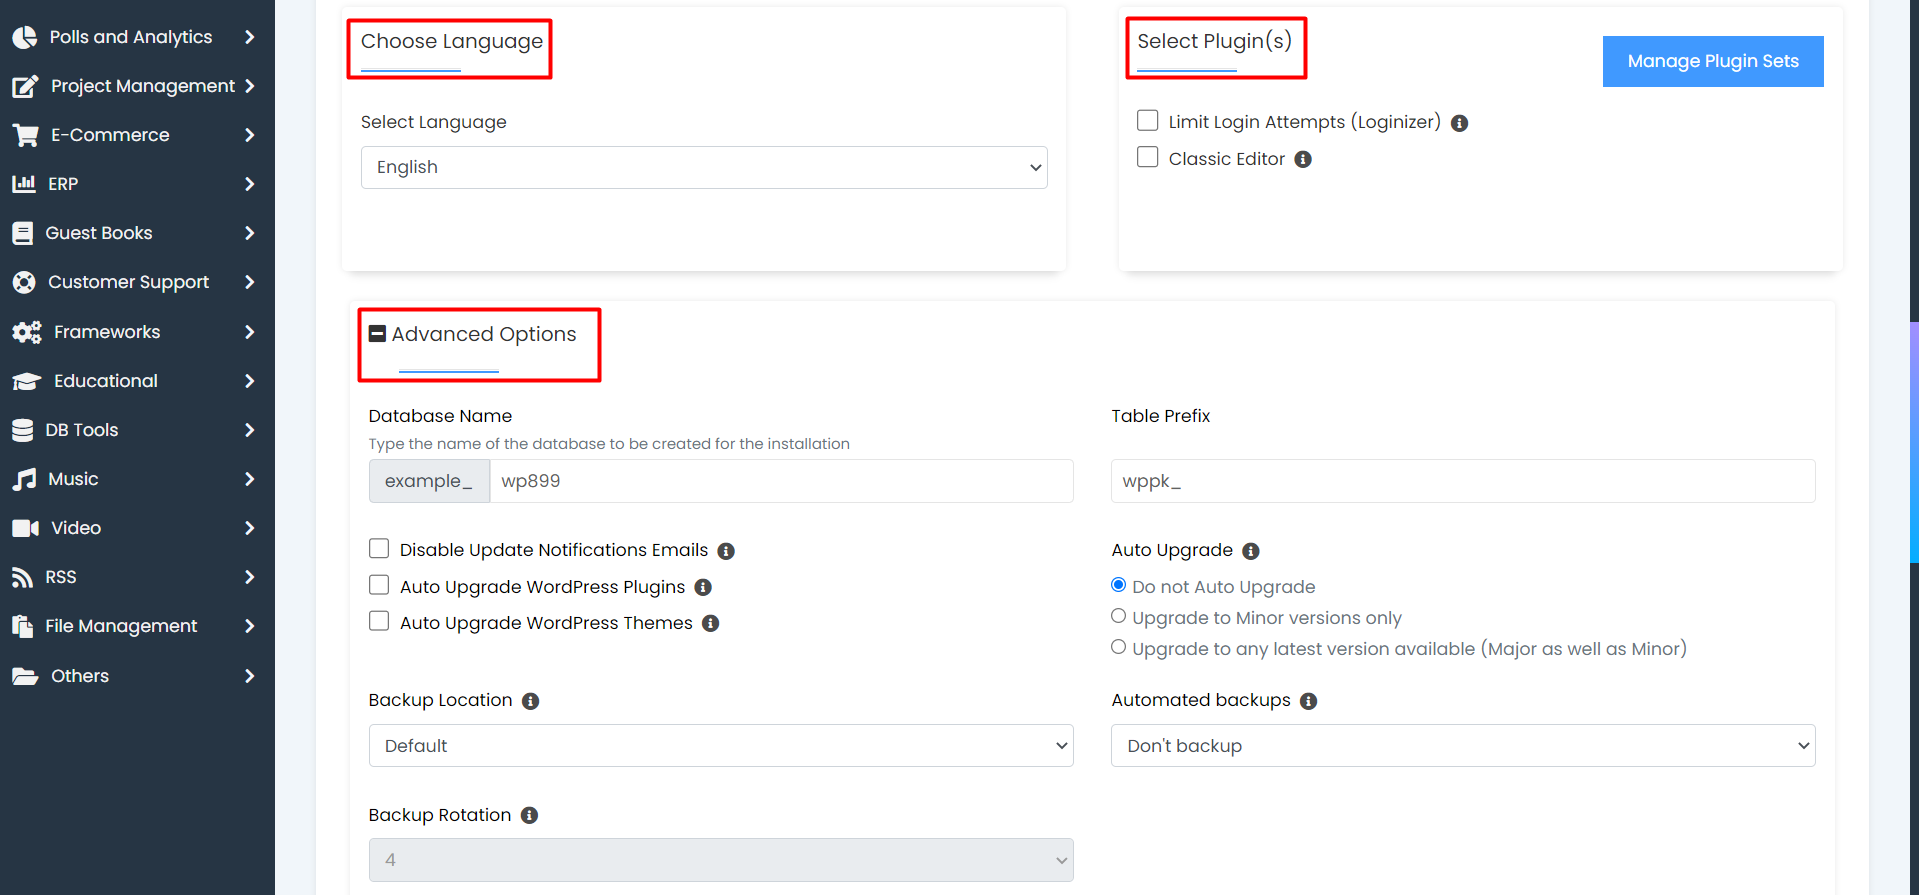
- Select Language: Select the language in which you want to install WordPress.
- Select Plugin(s): Select the plugins if you want to install them.
- Advanced Options: From advanced options, you may change or select...
- Database Name
- Table Prefix
- Backup Location ( Choose the backup location to be used while backing up this installation )
- Auto Upgrade ( Select the automatic upgrade preference for this installation when a new version is available )
- Automated backups ( Softaculous will take automated backups via CRON as per the frequency you select )
- Backup Rotation ( If the backup rotation limit is reached Softaculous will delete the oldest backup for this installation and create a new backup. The backups will utilize your space so choose the backup rotation as per the space available on your server )
- Database Name
Step 06: Select a theme, though this is optional. If not selected, the default theme will be installed.
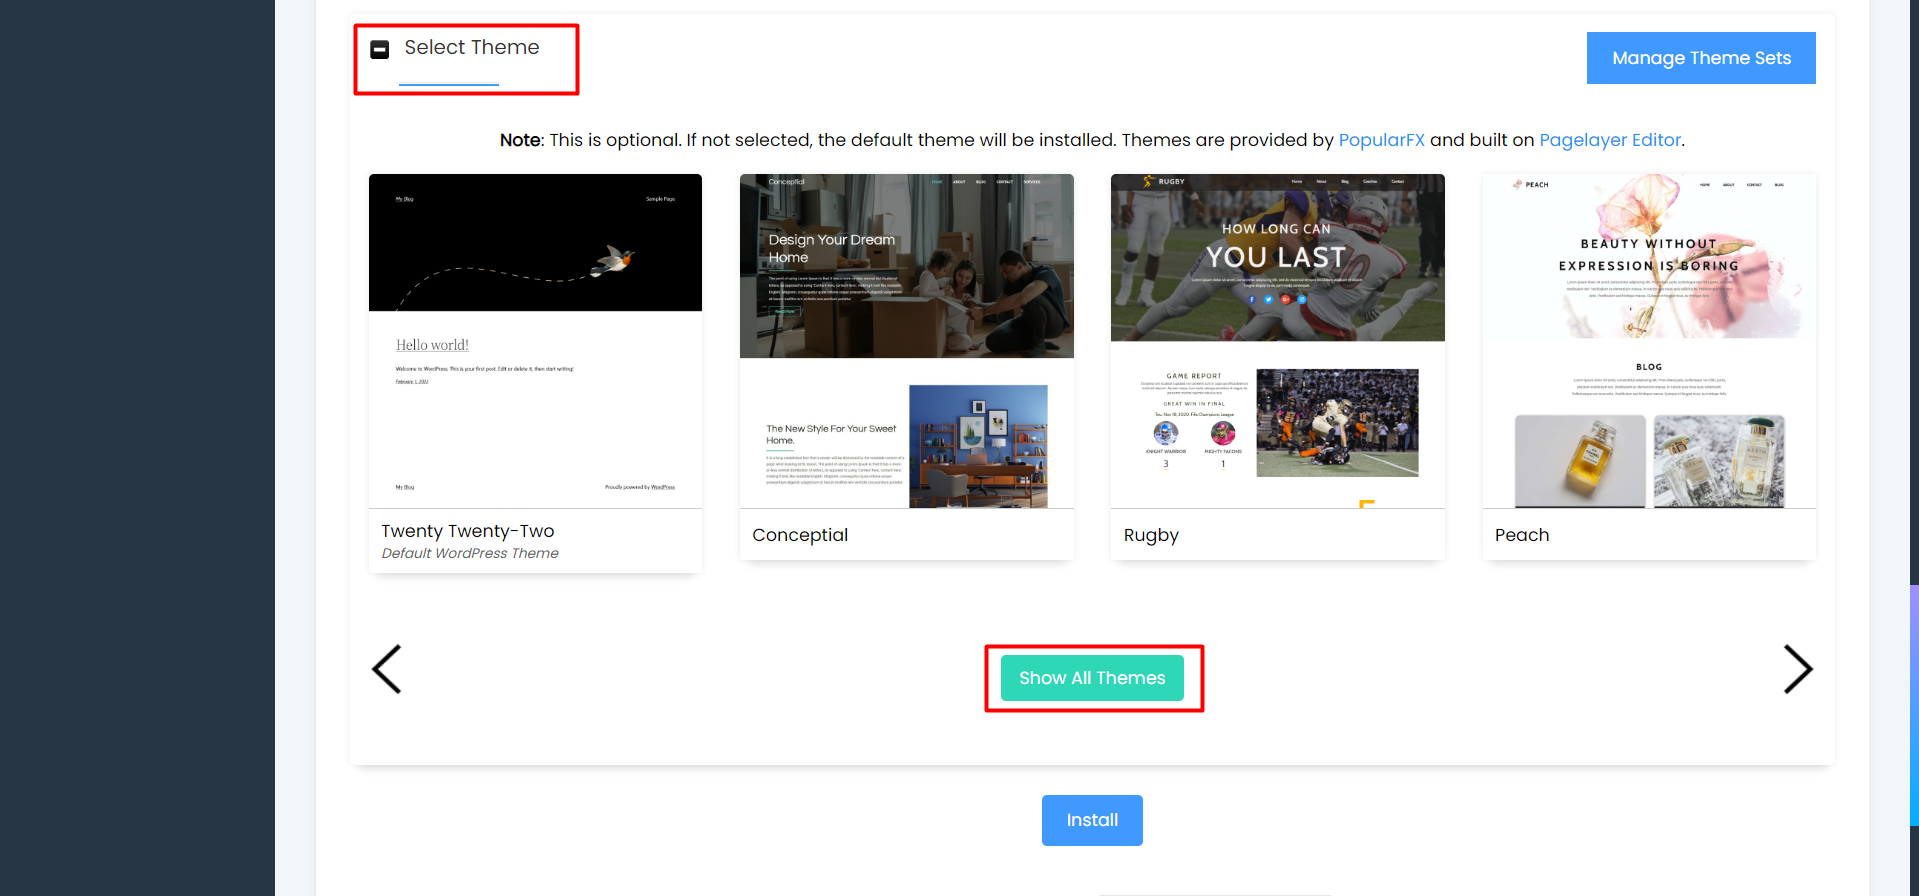
Step 07: Click on the Install button to start the installation process.

OR If you will face any issues, please email us at support@adndiginet.com for more technical support.


